Minimalist Milk Gel Nails with Encapsulated Real Dried Flowers
Embrace delicate cottagecore aesthetics with real encapsulated dried flowers over a semi-sheer milk gel base. Learn how to craft this airy, botanical nail art look step-by-step.
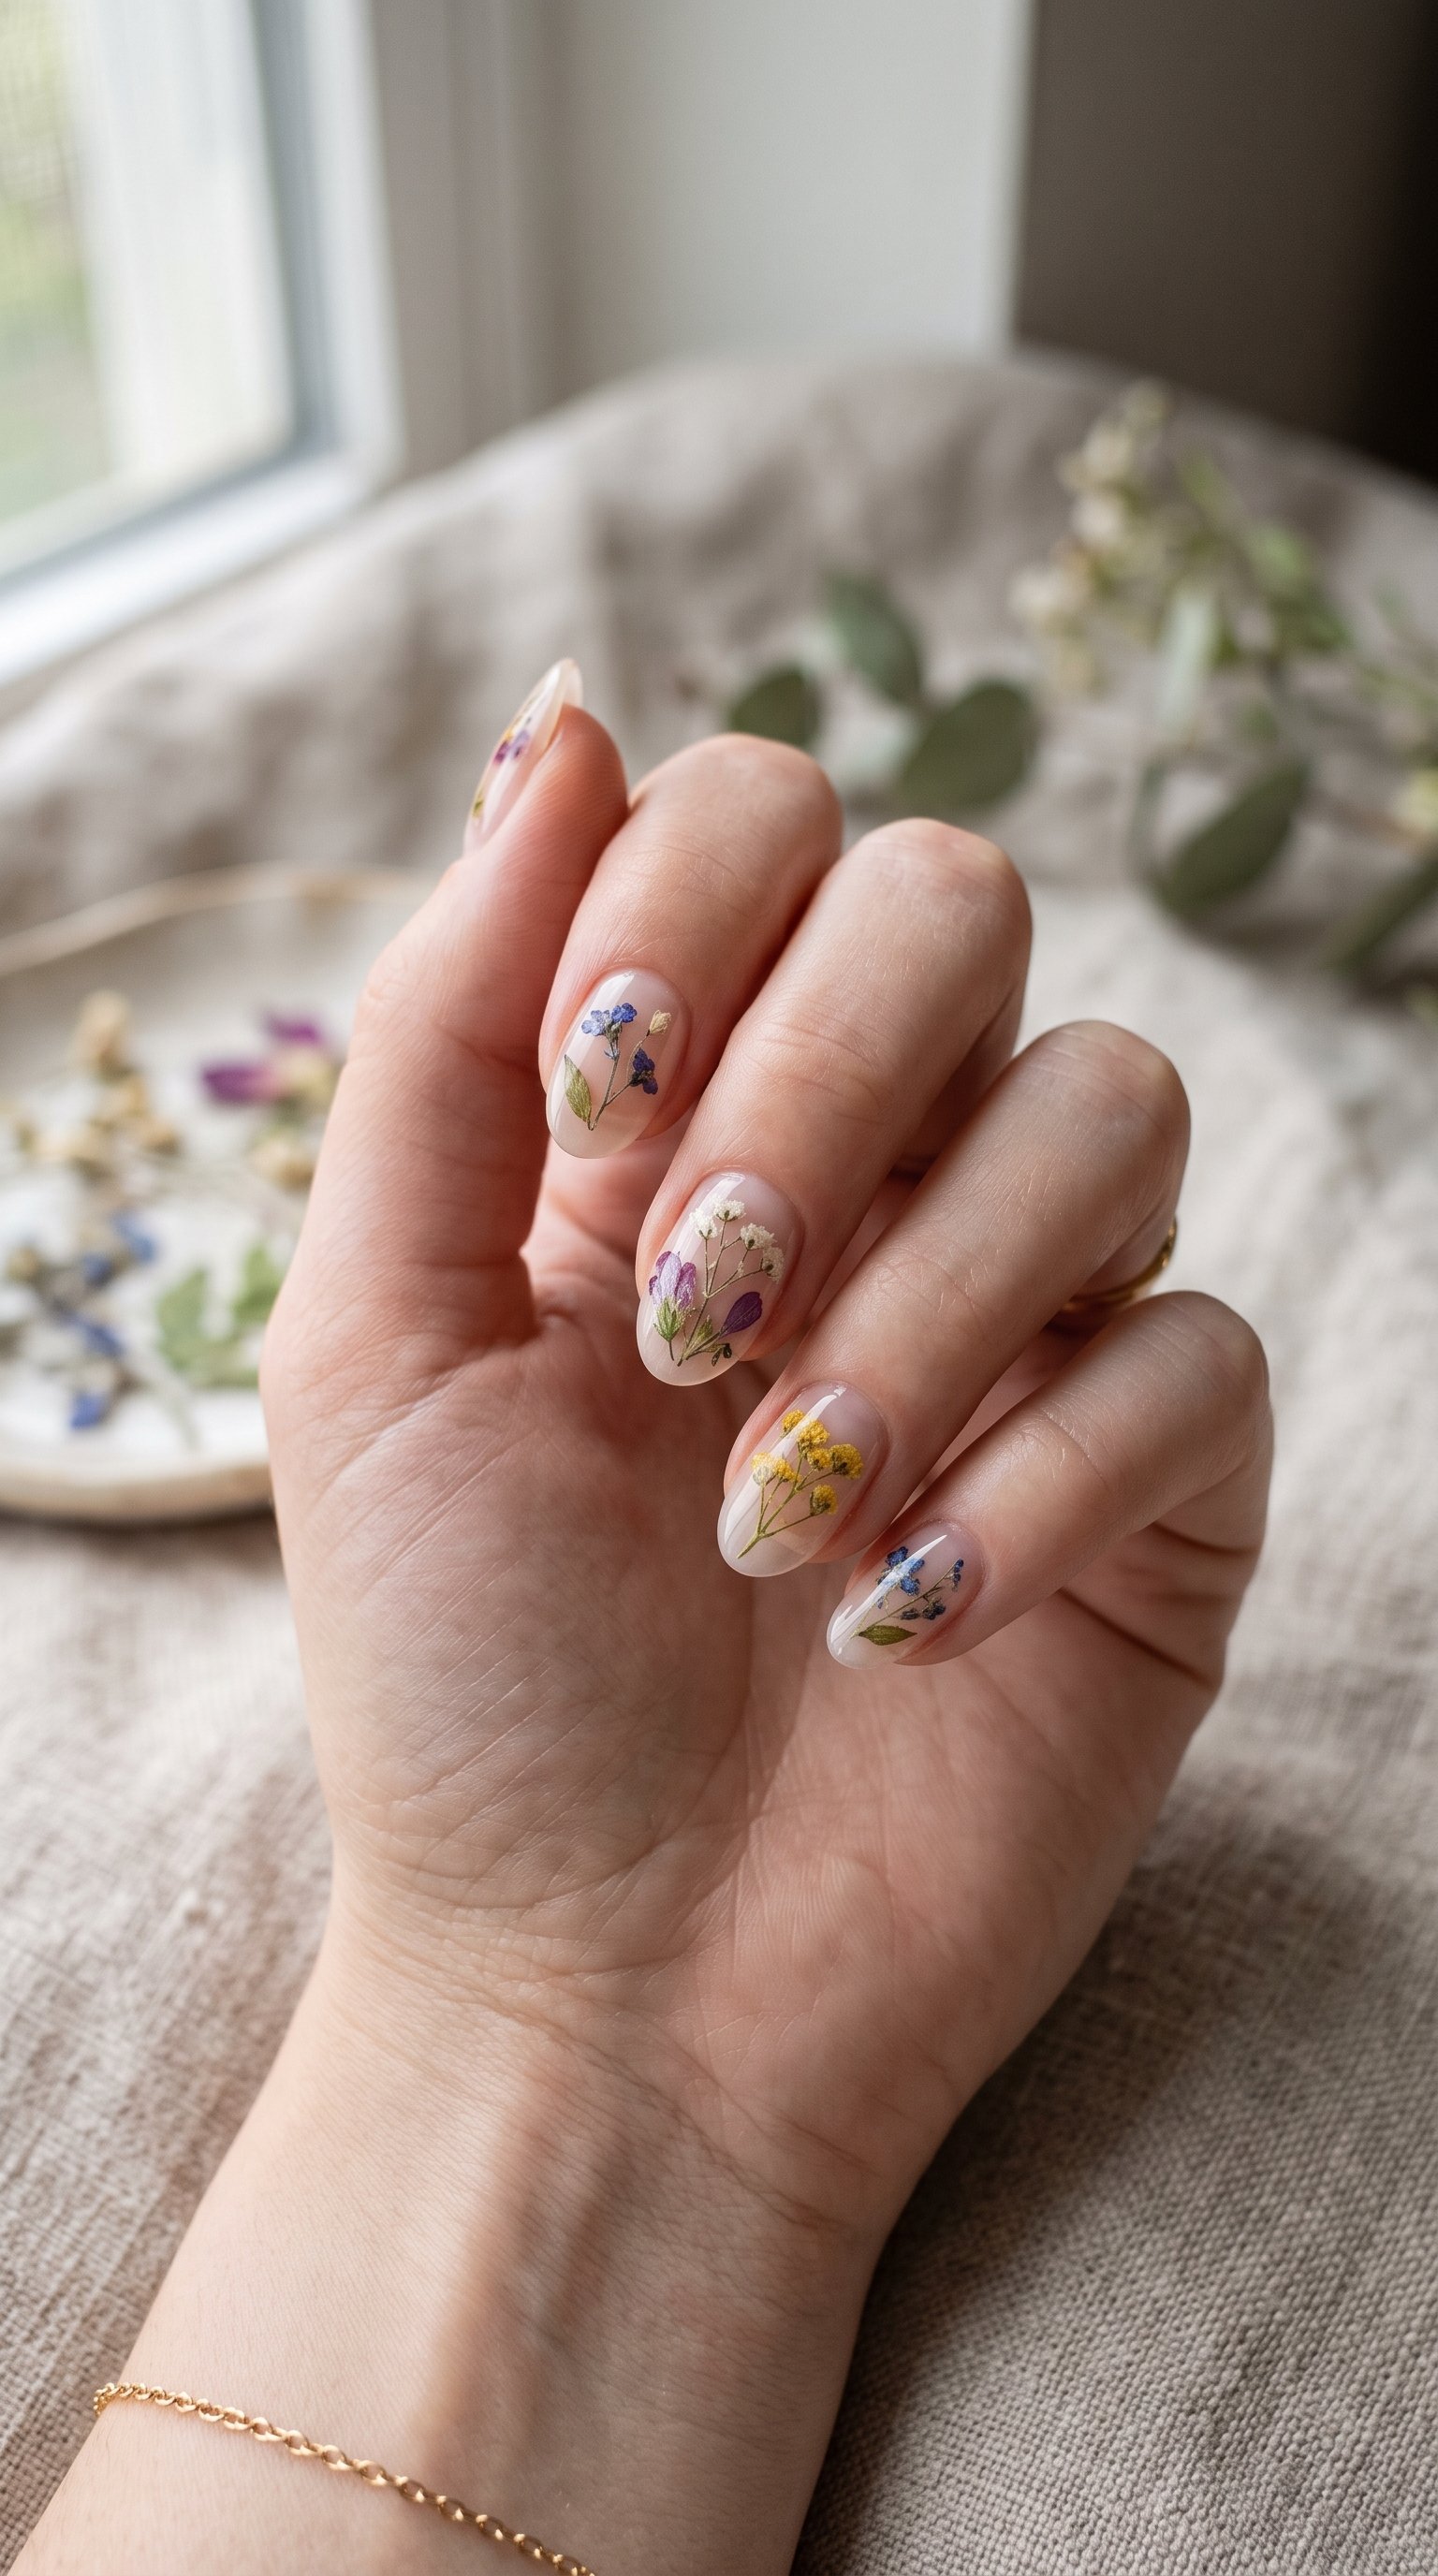
Capture the soft beauty of nature with encapsulated dried flower nail art. Featuring tiny wildflower stems set over a translucent, milky base, this romantic manicure offers a whimsical, handcrafted touch perfect for spring and summer.
What You Will Need
- Milky white or semi-sheer nude gel polish
- Mini real dried nail art flowers (blue, purple, white, yellow)
- Precision tweezers or a silicone nail art tool
- Clear builder gel or structure gel (for encapsulation)
- Glossy gel top coat & UV/LED lamp
Step-by-Step Tutorial
- Prep and Base: Shape nails into a soft oval or almond shape. Apply a clear gel base coat and cure under the LED lamp for 60 seconds.
- Apply Sheer Color: Paint 1–2 thin coats of semi-sheer milky gel polish to create a translucent canvas. Cure between coats.
- Place the Dried Flowers: Apply a thin layer of un-cured builder gel. Gently press tiny dried flower stems onto each nail using tweezers, pressing the petals flat against the nail bed.
- Encapsulate and Seal: Float a coat of clear builder gel over the flowers to submerge them completely, cure for 60 seconds, and finish with a high-shine top coat.
Style Tips
Nail Shape: Beautiful on oval or almond shapes, which accentuate the natural curvature of delicate flower stems.
Outfit Pairing: Pairs wonderfully with linen dresses, soft pastel knitwear, or delicate gold chain jewelry.
Application Trick: Lightly press dried blooms onto a sticky layer of gel to prevent petals from curling up before encapsulation.